

Add your first property
Your first property is free. Pick your situation, property type, rental arrangement, and address, then set up your tenant, lease, and rent.
Once your profile is set up, Propero drops you on Home, empty and waiting for your first property. Tap Add property (the button on the empty Home screen, or the + in the top-right corner) to start a short flow: your situation with the property, its type and rental arrangement, its address, and then either tenant setup or listing photos, depending on your situation.
Every number and date field in the setup flow shows a Done bar above the keyboard so you can dismiss it cleanly.
First property is free
Your first property is free. Adding more properties requires Propero Pro.
Choose your situation
On What's your situation?, tell Propero where things stand with the property:
- I have a tenant: "We'll set up your tenant and lease together." Selected by default.
- I'm looking for a tenant: "We'll get your property ready to show."
- My tenant moves in soon: "We'll get everything ready for day one."
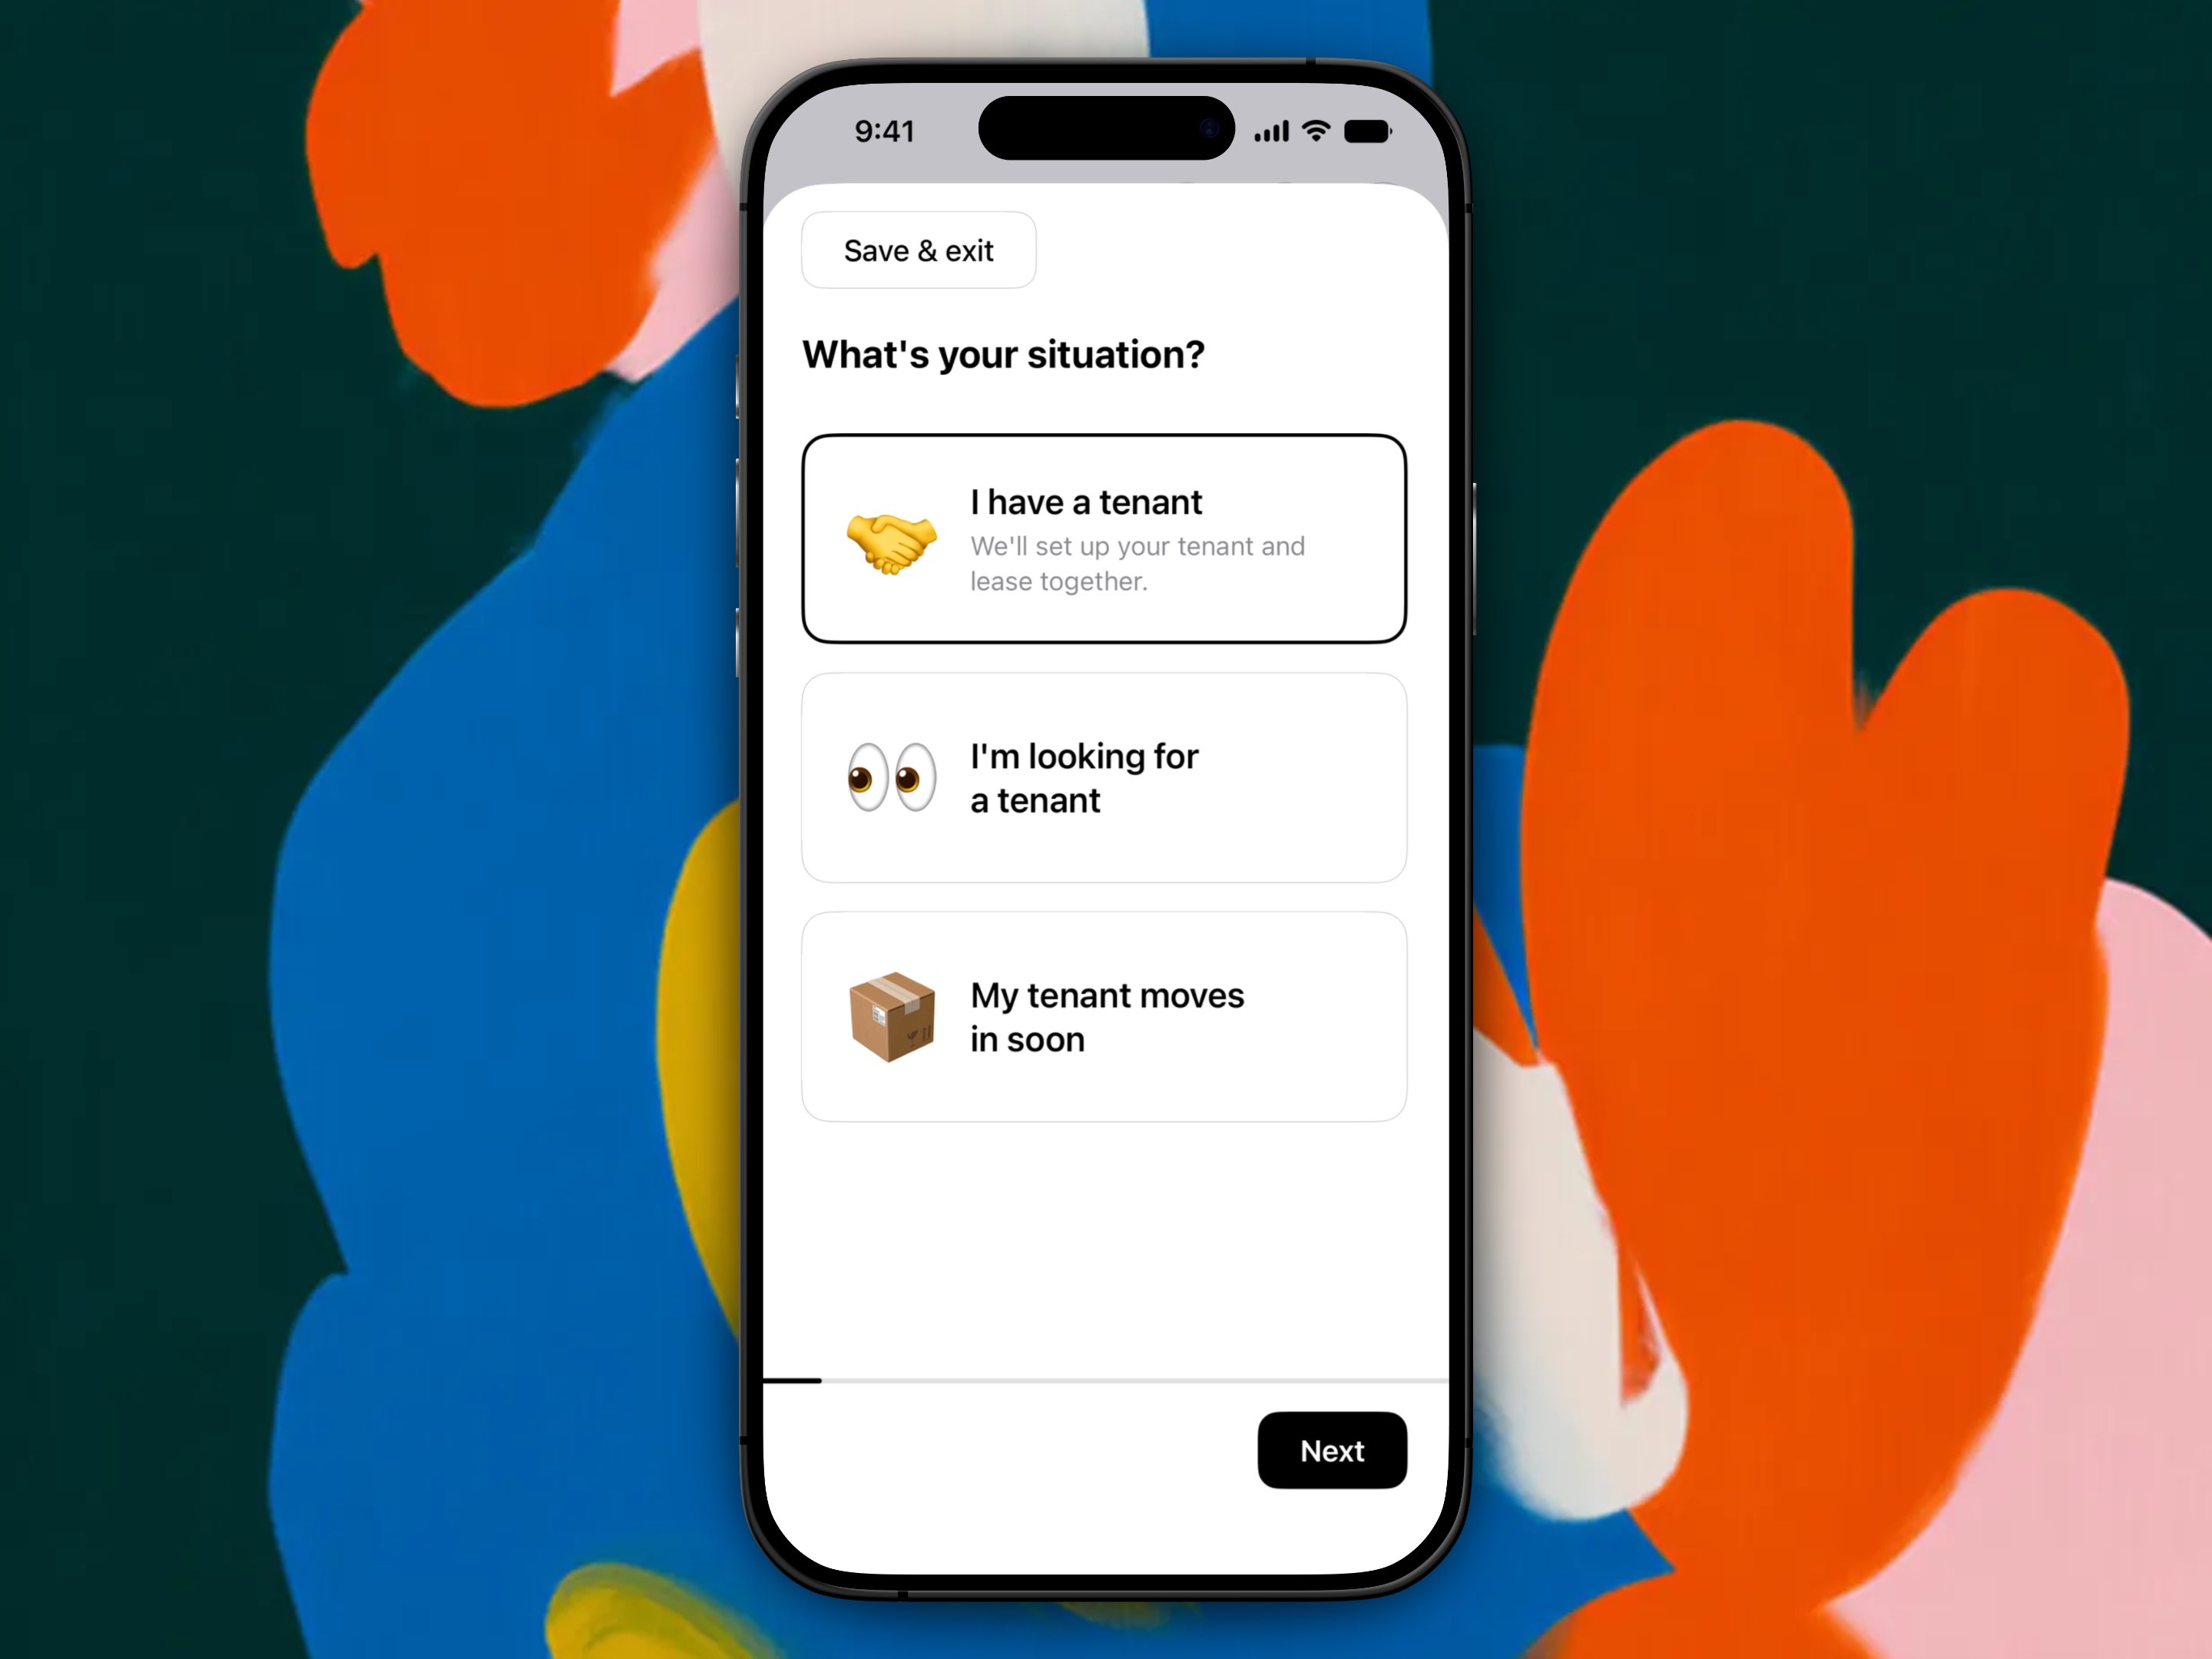
This choice decides what happens after the property is saved. I have a tenant and My tenant moves in soon both walk you through tenant and lease details. I'm looking for a tenant skips that and walks you through listing photos instead.
Property type and rental arrangement
Next, on Which is closest?, pick a type: House, Terrace, Apartment, Unit, Rural, or Land.
Then, on What are you renting out?, choose the arrangement:
- An entire place: the tenant rents the whole property
- A private room: one room, with shared common areas
- A shared space: the tenant shares the space with others
Both screens back to back: pick the type, then the arrangement.
On A few basics, set bedroom, bathroom, and parking space counts. You can fine-tune these any time in property settings.
The rest of the flow end to end: the basics counters, the address search and its confirmation screen, That's the hard part done, then tenant details, lease terms, and financials through to Check the details.
Address
Then Propero asks for the address on Where is it?. Start typing to search, and confirm the match on the Does this look right? screen.
Prefer not to search? Tap Enter address manually or Use my current location instead.
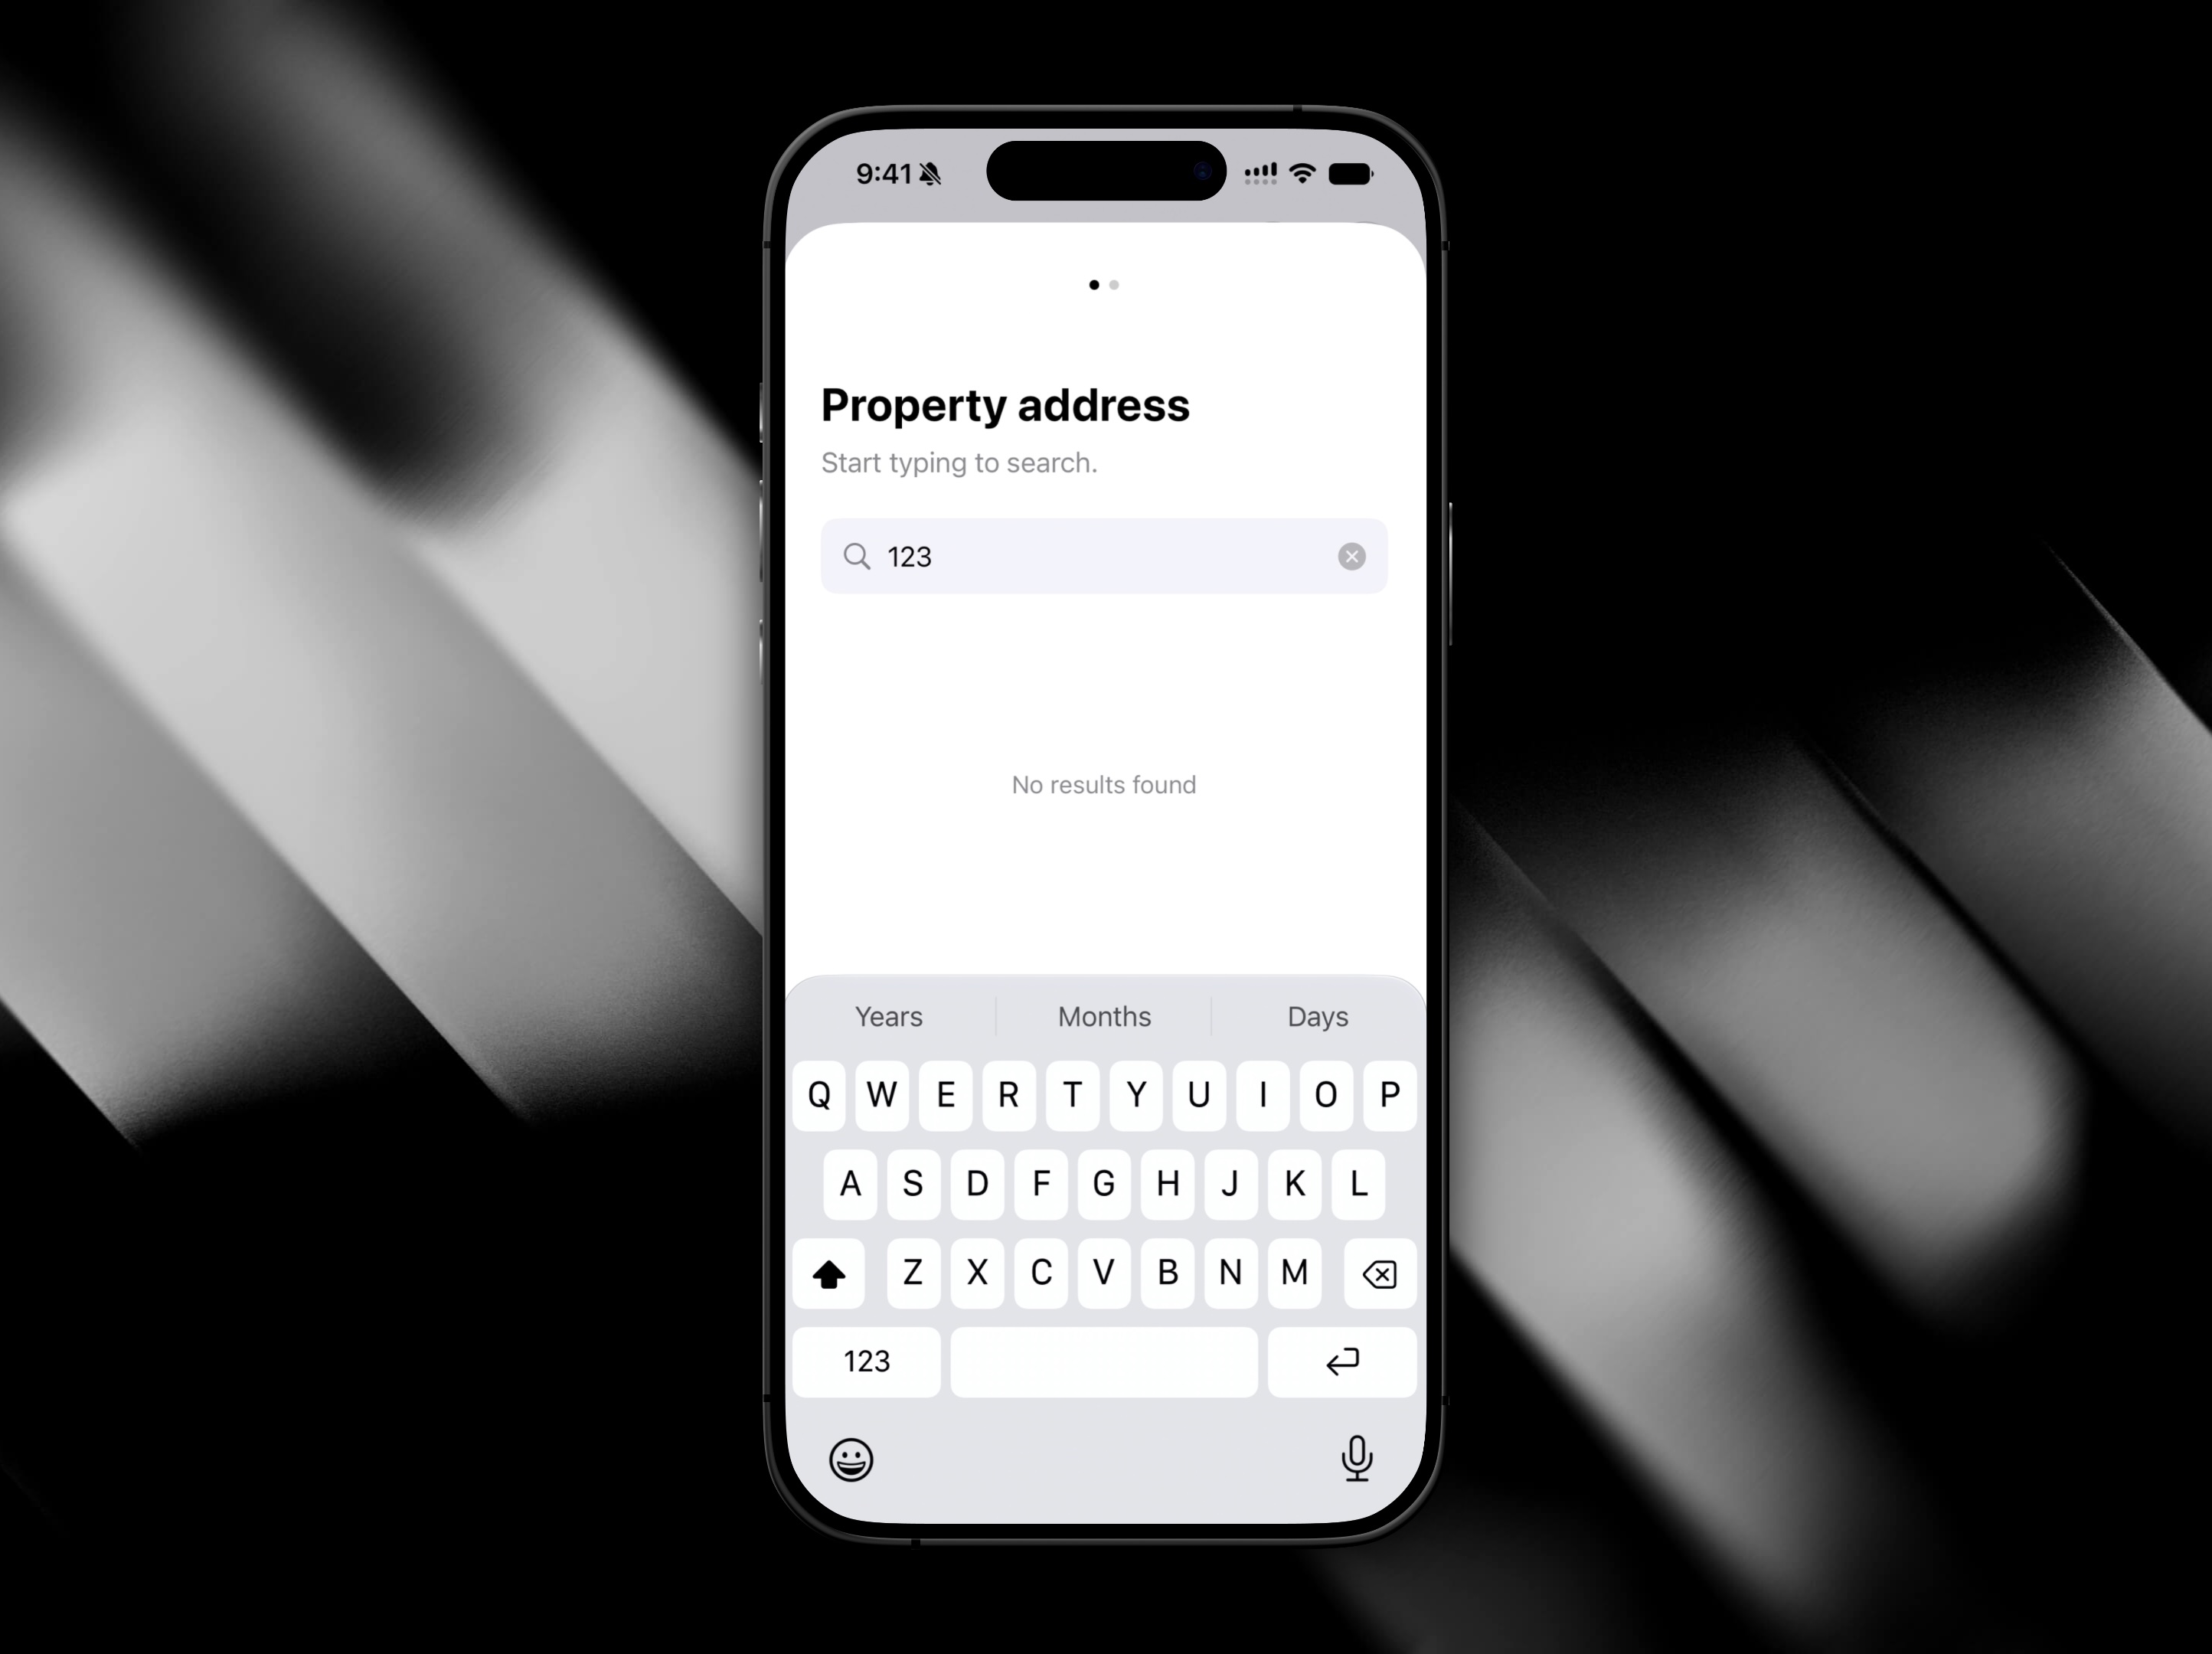
On the confirmation step, add or correct the unit number, street number, street name, suburb, state, or postcode, then tap Add property to save it.
After the property saves
Propero shows a That's the hard part done screen next.
The button depends on the situation you picked:
| Situation | Button | What happens next |
|---|---|---|
| I have a tenant / My tenant moves in soon | Set up tenant | Walks you through tenant and lease details |
| I'm looking for a tenant | Add photos | Walks you through listing photos and property features |
Not ready to finish either path? Tap I'll do this later to skip straight to Home. The property is already saved either way: you can pick up tenant or listing setup from the property hub whenever you're ready.
Add your tenant
If you continue with Set up tenant, Propero walks you through their details and lease terms across several steps.
Tenant info
| Field | Notes |
|---|---|
| Full name | The tenant's full name |
| Used when you send receipts and other communications | |
| Phone number | Optional |
Tap Add another tenant to include additional tenants on the lease.
Main contact
If there's more than one tenant, a dedicated step asks Who's the main contact? Select the lead tenant. They'll receive rent reminders, receipts, and messages by default.
Lease terms
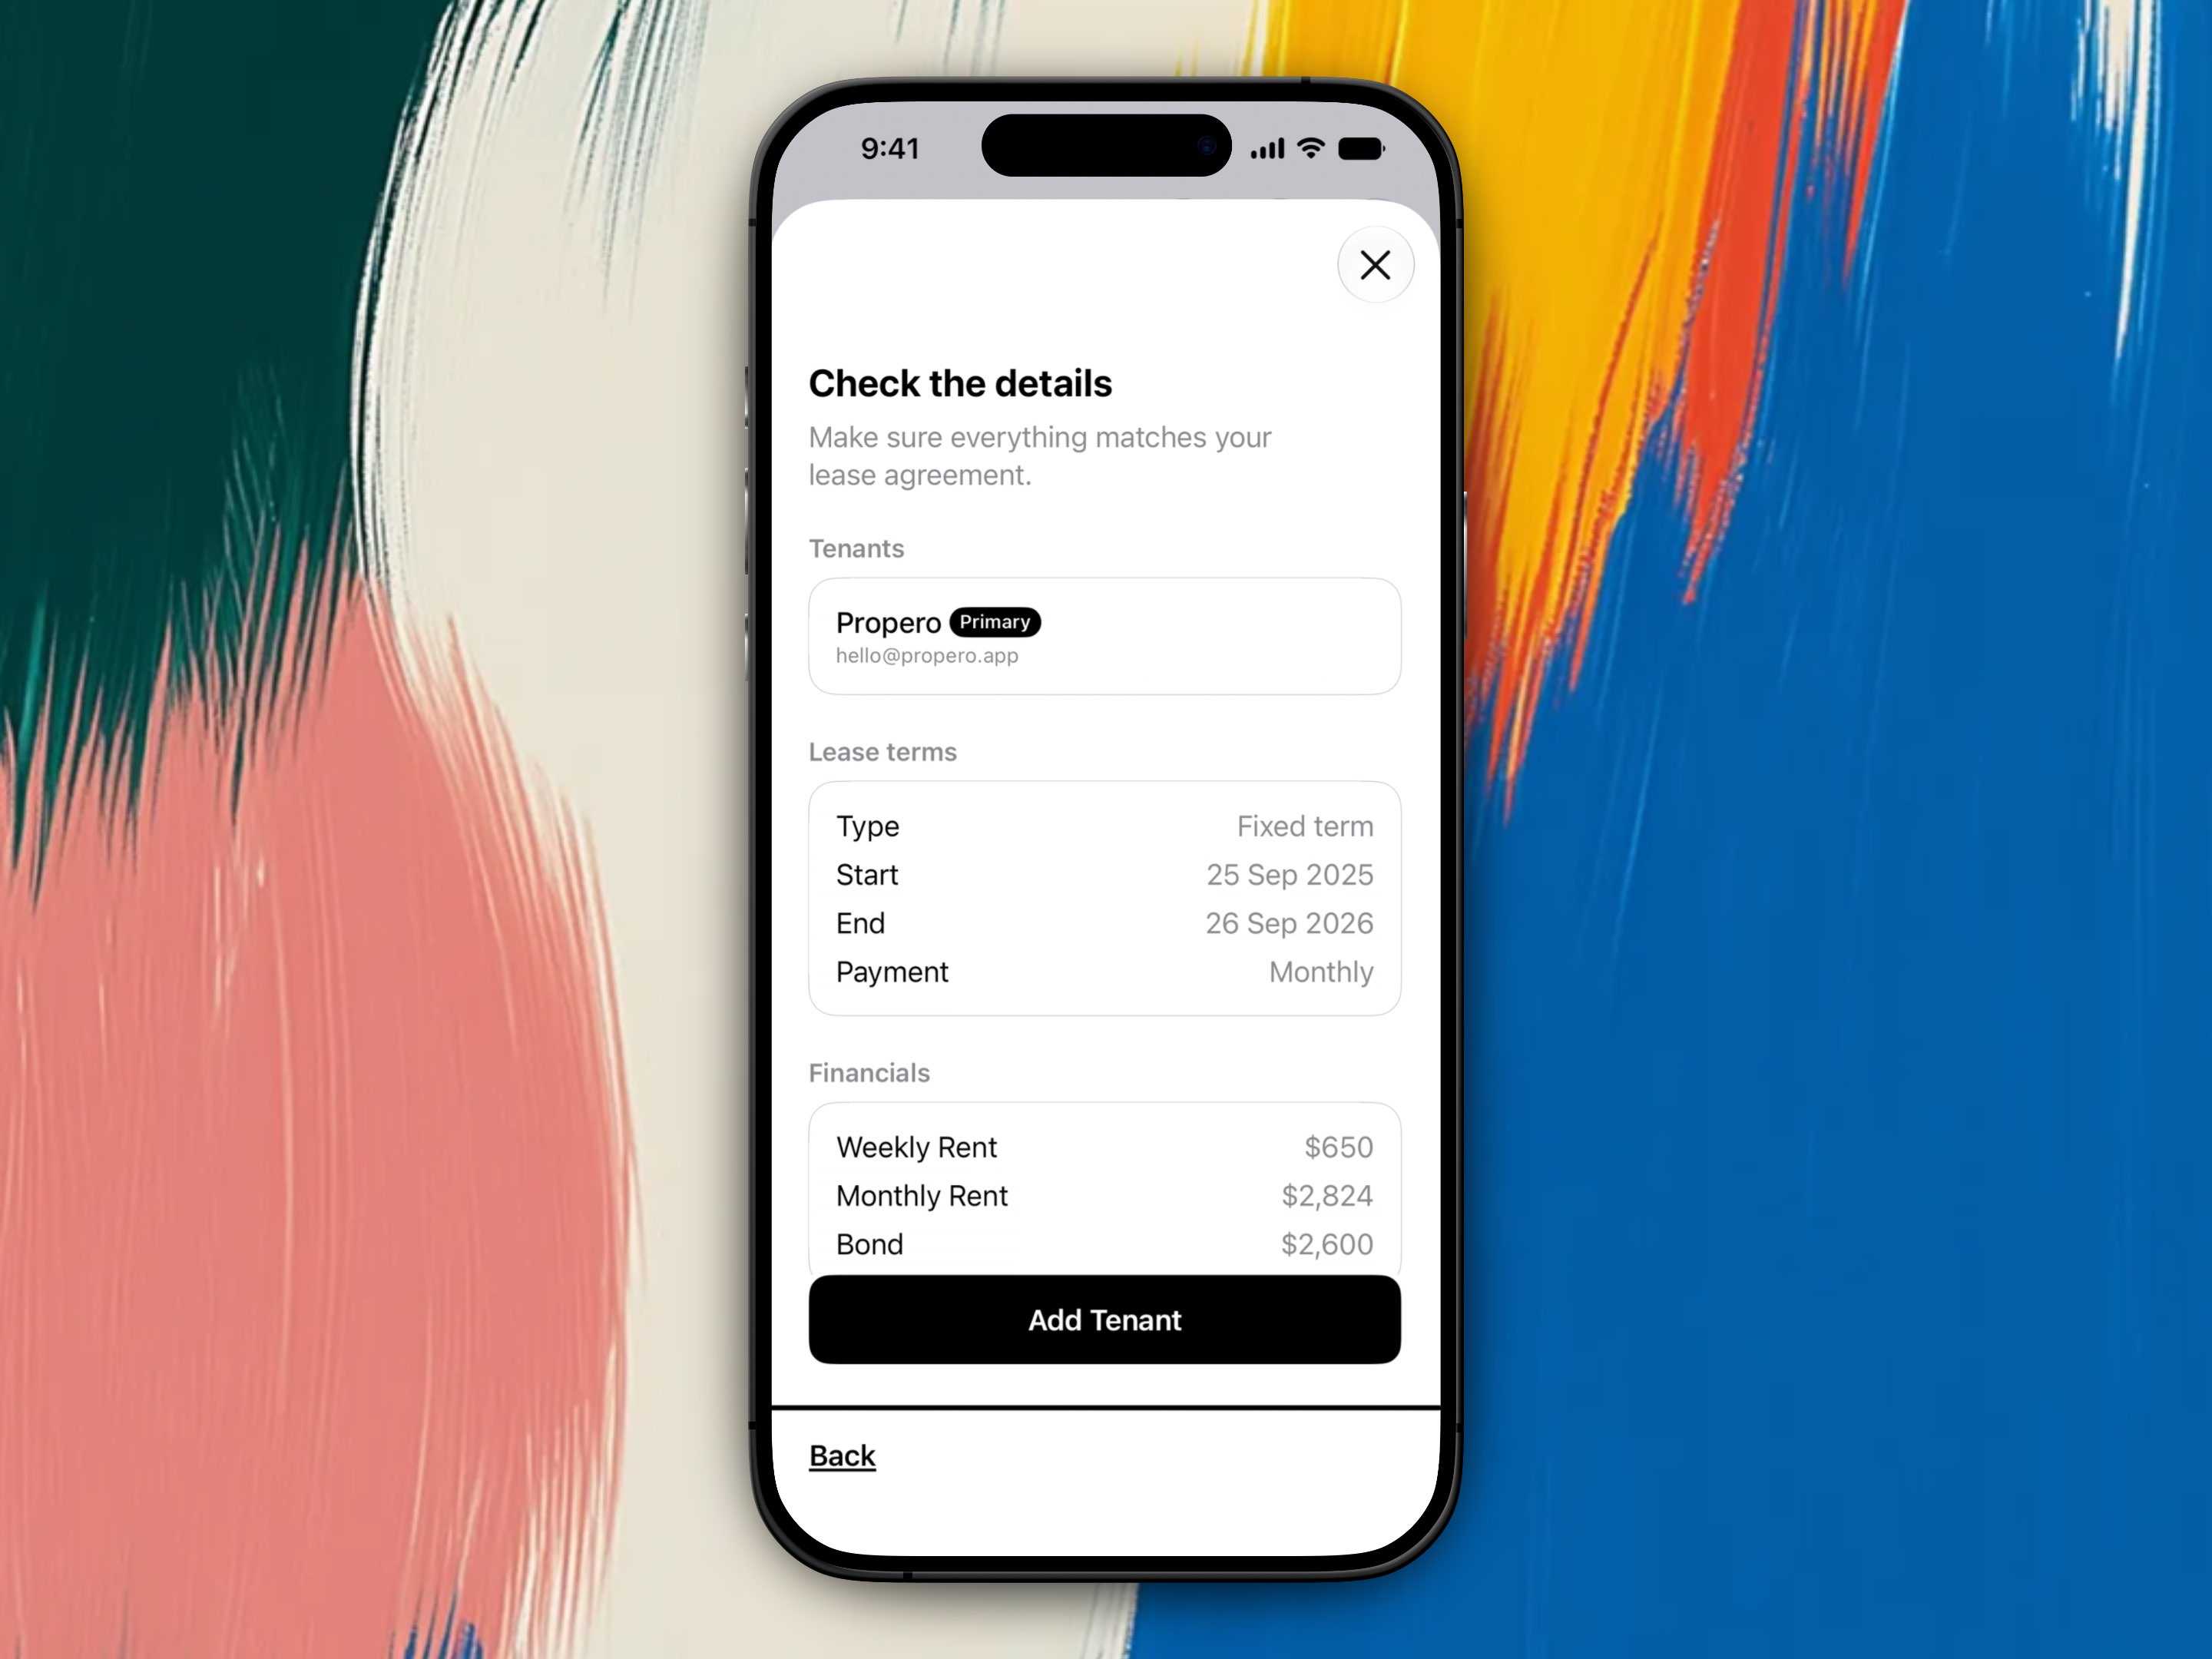
Choose the lease type (Fixed term or Periodic), the start date, and payment frequency (Weekly, Fortnightly, or Monthly).
For a fixed term, pick a term next: 6 months, 12 months, or Other for a custom end date. The end date is filled in from your choice and shown in full with the year. Change the start date and the end date follows for the term you picked. If something looks off, a quiet check line appears under the dates.
Lease dates can't be edited after setup. To change them later, end the tenancy and start a new lease from Lease Overview.
Financials
| Field | Notes |
|---|---|
| Weekly rent | Rent is always entered as a weekly amount. Propero converts it to your chosen frequency for the schedule. |
| Bond amount | Defaults to four weeks' rent. You can adjust it. Propero records the figure; you still lodge the bond with your state authority. See Starting a tenancy resources. |
| Advance rent paid | Rent the tenant has already paid before the lease starts. Shown when the lease starts today or later. Not asked if you chose My tenant moves in soon, since there's no rent history yet. |
| Paid up to and including | Shown instead of advance rent when the lease started before today. The last day your tenant has paid for, so Propero knows where to pick the rent up. |
If the tenancy started before today, Propero begins tracking rent from the day after your paid-to date rather than back-filling months of overdue periods, and that day becomes the rent day. See Backdated tenancies.
Review everything on the Check the details screen ("Make sure everything matches your lease agreement."), then tap Add Tenant to confirm.
Rent terms are fixed for the lease
Once the lease is running, rent frequency and other lease terms cannot be changed in the app. To change terms, end the current lease and start a new one from Lease Overview. See Leases & tenancy agreements.
Looking for a tenant instead?
If you chose I'm looking for a tenant, tapping Add photos takes you through Add some photos and What does your place offer? instead, building the listing Propero uses when you advertise the vacancy.
On Add some photos, each photo gets its own tile with its file size (photos are capped at 1 MB each) and an upload progress ring. Next enables as soon as you've selected photos; uploads keep running in the background while you pick features on the next step. See Advertising your property for the full listing flow.
Add a lease agreement
Once tenant setup is done, attach your signed lease as a PDF:
- Open the property from Home
- Tap the Lease pulse card to open Lease Overview
- Tap Options, then Upload Lease Agreement
Only PDF files are accepted (not photos), and lease details on this screen are read-only since terms are set during tenant setup.
Once it's uploaded, the agreement sits on Lease Overview under Document, alongside the countdown to the end of the term and the lease details.
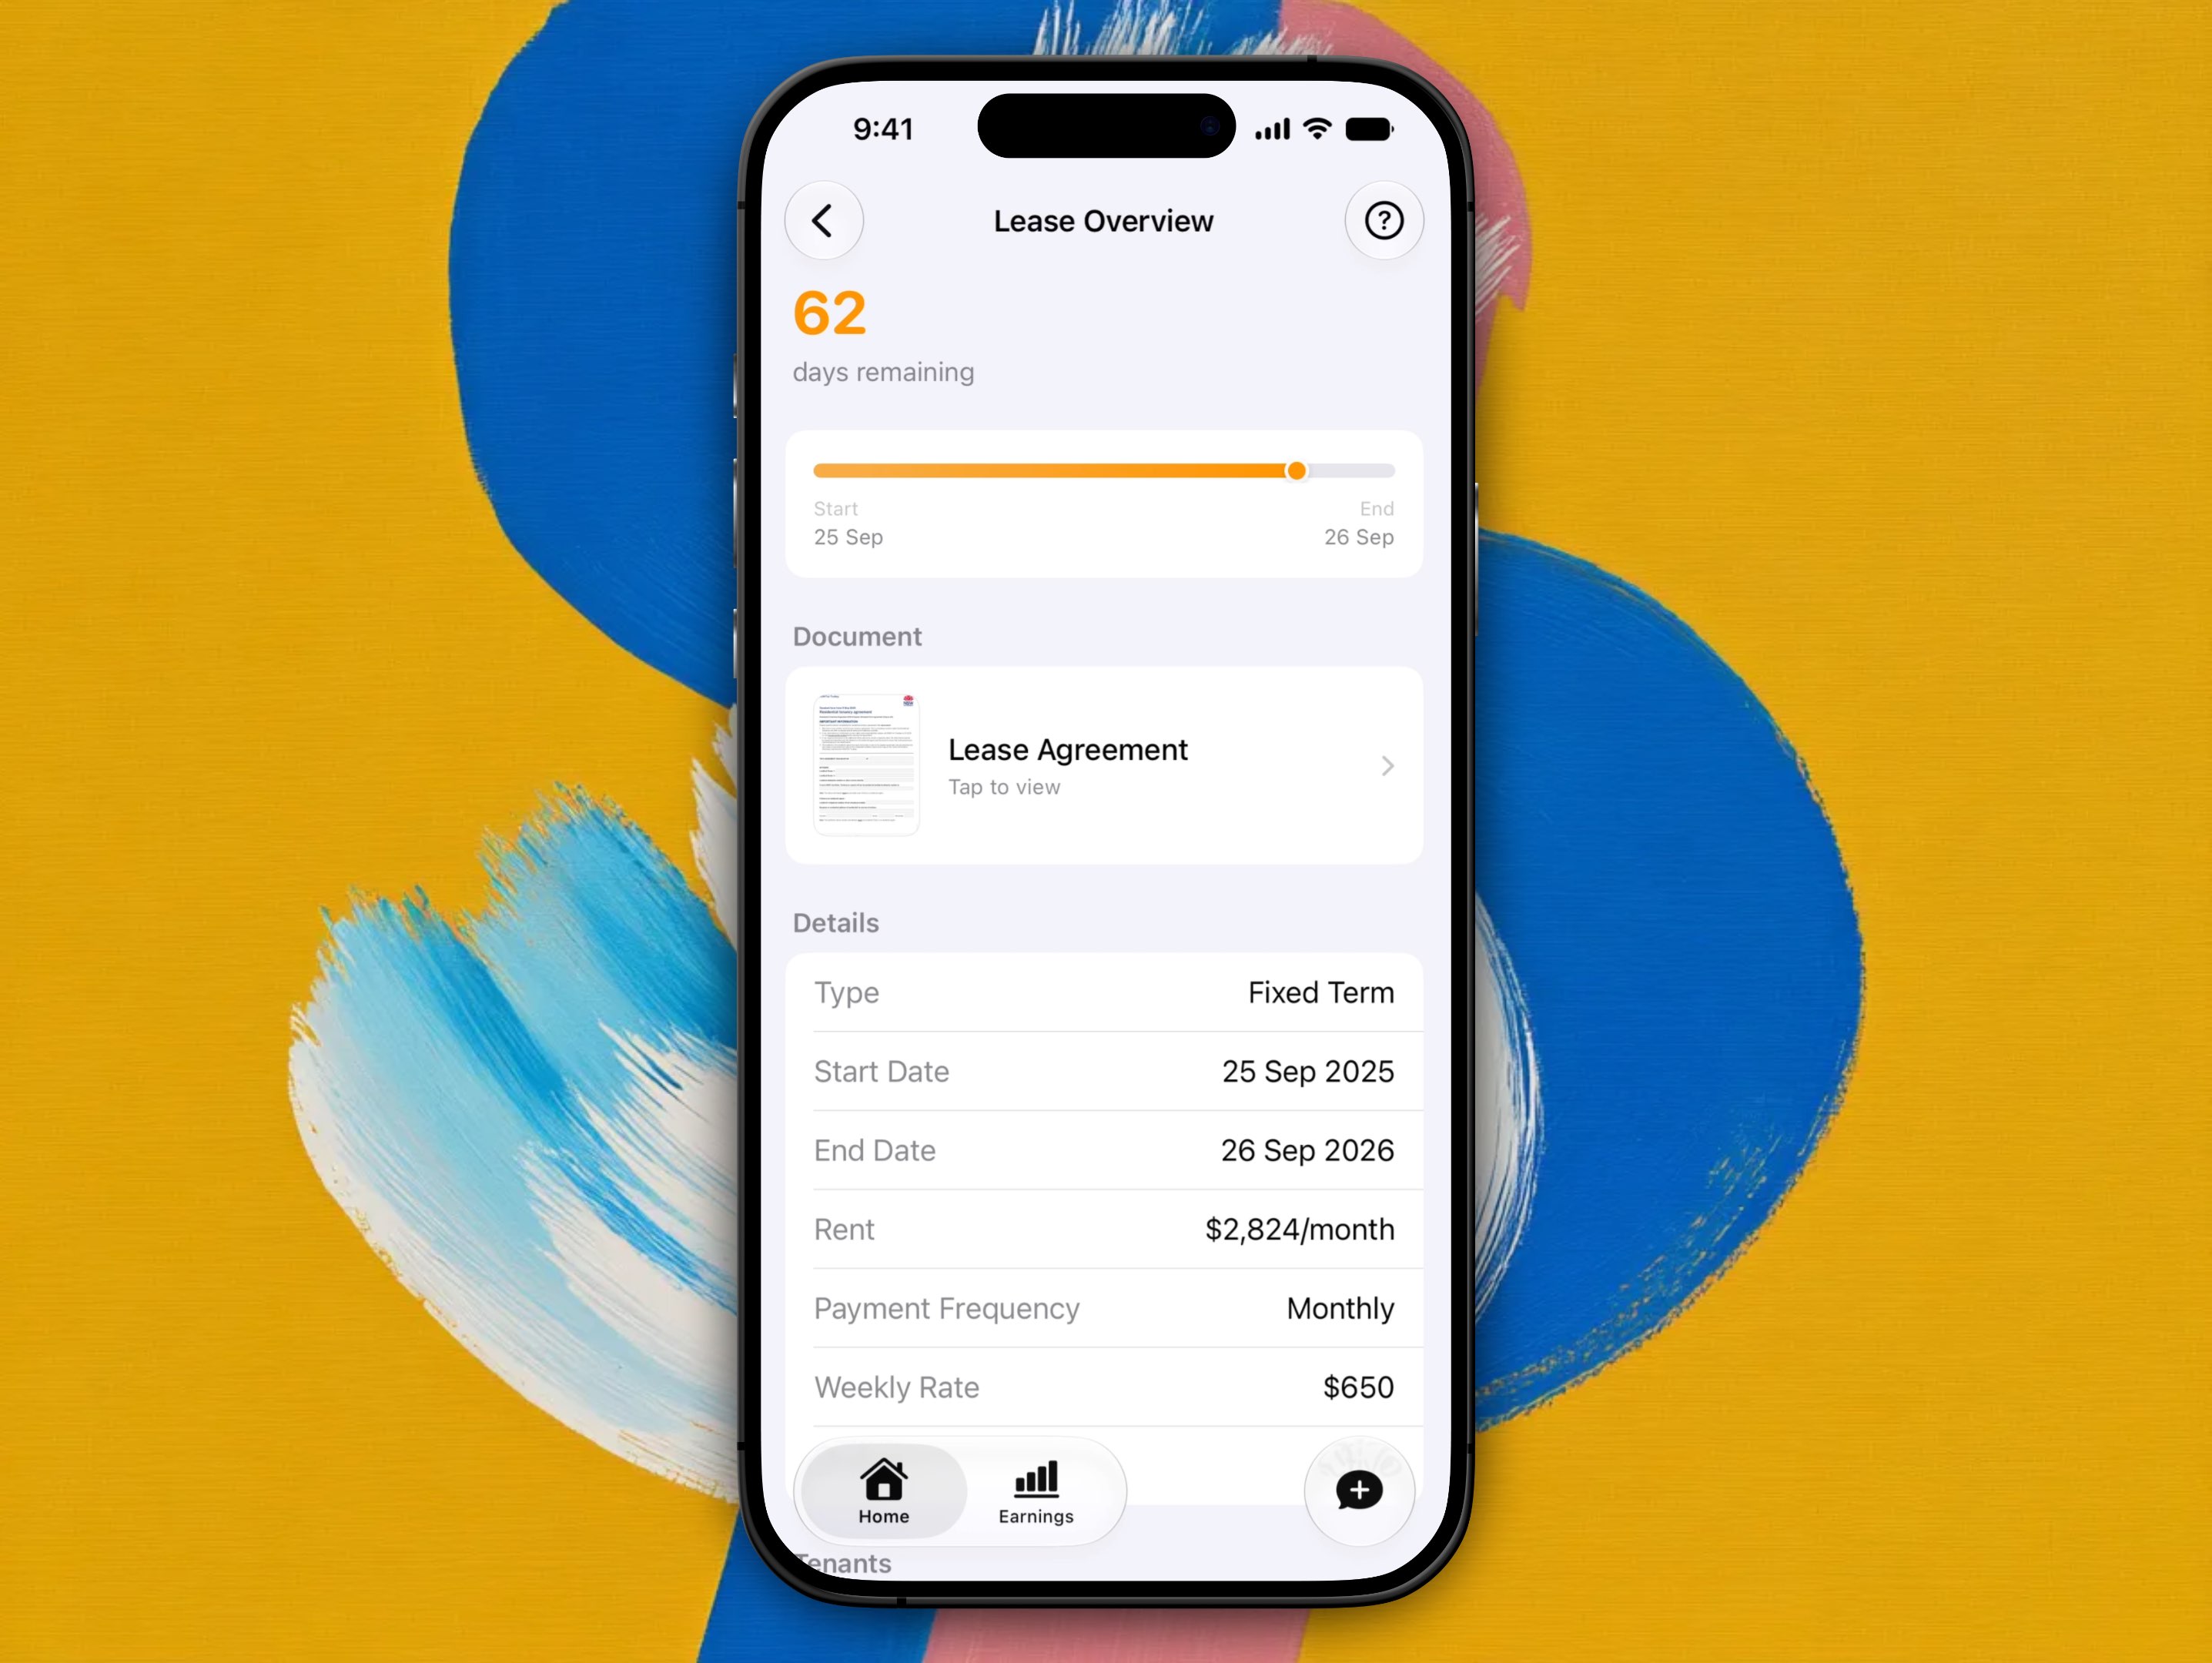
You can upload the lease at any time from Lease Overview.
Next steps
Your property is set up. Next, take a tour of the app in Navigating the app.
If you add more properties later, see Adding another property.
Create your account
Download Propero from the App Store, sign up with Apple, Google, or email, set your name and mobile, answer two quick questions, and meet your property's email address before the Pro paywall.
Navigating the app
Home, Earnings, and Chat are Propero's three tabs. Find the property hub's pulse cards, status pills, and where every common task lives.